
Turn Layovers into Little Heirlooms: 10 Keepsakes You Can Make While Waiting at the Airport
Turn airport waits into keepsakes with quick layover crafts, TSA wait-time planning, and 10 portable DIY memory ideas.
Layovers have a way of stretching time. One minute you are checking the departure board, and the next you are sitting under fluorescent light with a lukewarm coffee, wondering how to make the wait feel a little less like dead time and a little more like part of the journey. That is exactly where layover crafts can change the mood. With a small portable craft kit, a few easy supplies, and a quick glance at TSA wait times, you can plan calming, meaningful projects that turn airport minutes into tiny keepsakes.
This guide is built for travelers who want more than distraction. It is for the parent saving boarding passes for a child’s memory box, the solo traveler making a mini travel journal, the friend who loves thoughtful handmade crafts, and anyone who has ever wanted to come home with something more personal than a magnet. We will cover ten airport-friendly projects, how to match each one to your wait time, and how to travel with crafts without creating security headaches. If you love the calm of making, you may also enjoy our guide to niche local attractions for travel days that feel more intentional, plus this practical look at reading travel schedules when routes change.
Why airport crafting works so well during layovers
It gives your nervous system a job it can finish
Airports are full of unfinished feelings: waiting, uncertainty, mild fatigue, and the constant low-level hum of decisions. A tiny craft project gives your hands a clear task and your mind a finite container, which can make a long layover feel steadier. That is why short creative rituals work so well in transit, especially if you have already checked live TSA checkpoint wait times and know exactly how much runway you have. Instead of doom-scrolling, you are making something that will outlast the trip.
It transforms “wasted” time into a memory marker
Travel memories blur quickly unless they are anchored to a physical object. A small tag with the date of a delayed flight, a pressed petal tucked into a journal, or a stamped note from a layover cafe can become the kind of object you keep for years. These are not just souvenirs; they are evidence that the moment mattered. For more ideas on turning found things into meaningful mementos, see found-object inspiration and the broader craft mindset behind authenticity in handmade work.
It helps you buy or pack with intention
Not every airport project deserves the same supplies. The best travelers with craft kits think in terms of time, tools, and cleanup. A 20-minute delay can hold a simple pen-and-paper project, while a 2-hour layover can support a more layered memory piece. This approach is similar to choosing the right tool for the job in other planning-heavy situations, whether you are organizing a trip with ?
How to use live TSA wait times to choose the right craft
Step 1: Check your time window before you unpack anything
The smartest airport DIY routine starts before you open your pouch. Use live wait-time tools in airline apps or airport apps to estimate how long you have before the next security checkpoint, boarding, or connection. If you have a predictable chunk of time, choose a project that fits the interval instead of forcing an overambitious one. This is the same kind of practical planning that helps travelers adapt to volatile conditions, like airfare volatility or even routes most at risk of rerouting.
Step 2: Match project complexity to wait length
A good rule: the shorter the layover, the more your craft should rely on pre-cut materials and basic writing tools. A 15-minute window is perfect for labeling, note-writing, or stamping. A 45-minute window can support collage, travel sketching, or a short journal prompt. A 2-hour layover may allow dried-flower assembly, thread work, or a more detailed memory page. Travelers who like systems will appreciate that this is basically simple time tracking for creativity.
Step 3: Leave room for boarding changes and gate moves
Airport time is never fully yours, so do not build a project that assumes uninterrupted focus. Keep projects portable, flat, and easy to pause. If you are connecting through a busy hub, make sure every step can be packed in less than two minutes. This is where a flexible kit matters just as much as the craft itself, much like preparing for route changes with a flexible travel kit or building a calm routine around travel in a changing market.
What to pack in a portable craft kit for airports
Start with non-messy essentials
Your kit should prioritize dry, quiet, low-fuss tools. Think: pen, pencil, washi tape, glue dots, mini scissors if permitted by security rules, sticky notes, small envelopes, pre-cut cardstock, and a slim journal. Add a few flat embellishments such as paper tickets, printed photos, thin ribbon, and botanical bits pressed at home. If you plan to use natural materials, pack them sealed between cardstock sheets to keep them safe and neat. You are aiming for something closer to a travel writing desk than a full craft room.
Choose materials that survive being carried
Layover crafts should be built for durability. Paper should be thick enough to handle handling, adhesives should be secure but not oozy, and any keepsake you make should tolerate being tucked into a backpack. For handmade items intended as gifts, durability matters even more; thoughtful finishing makes the difference between a charming object and a tired one. That same logic appears in guides on shipping high-value items and secure packing best practices, because memory items deserve the same care as anything precious.
Pre-assemble “kits within the kit”
Instead of throwing everything into one pouch, divide supplies by project type. Make one pouch for writing, one for embellishing, one for botanical keepsakes, and one for photo-based pages. That way you can grab only what fits the time you have. Travelers already know this principle from other smart packing habits, including the kind of organization discussed in route-change packing guides and even the practical thinking behind maximizing trade-in value: keep what helps, leave what slows you down.
| Layover length | Best project type | Supplies needed | Cleanup level | Best result |
|---|---|---|---|---|
| 15 minutes | Ticket-date tags | Cardstock, pen, hole punch | Very low | Quick date keepsake |
| 30 minutes | Mini travel journal page | Journal, stickers, pen | Low | Completed memory entry |
| 45 minutes | Souvenir collage | Glue dots, paper ephemera, tape | Low to medium | Layered visual memento |
| 60 minutes | Pressed flower bookmark | Pressed petals, laminating sleeve or clear tape | Low | Giftable bookmark |
| 90+ minutes | Photo memory card set | Printed photos, labels, envelopes | Medium | Heirloom-style mini archive |
10 airport keepsakes you can make while waiting
1. Ticket-date tags
Cut small tags from cardstock, punch a hole at the top, and write the flight number, date, city pair, and one sentence about the day. Add a ribbon loop if you want to attach it to a gift, journal, or baggage handle. This is one of the best souvenir DIY projects because it is fast, sentimental, and impossible to mess up. It also works beautifully when you have only a short break between gates.
2. Mini travel journal page
Bring a tiny notebook or fold a sheet into a passport-size zine. Write down what you can see, smell, hear, and feel in the terminal, then add a quick sketch of your gate sign or coffee cup. A mini travel journal is especially powerful because it captures the atmosphere, not just the itinerary. For creators who like more structure, this pairs well with the note-taking discipline behind interactive content hooks and the story framing found in ?
3. Pressed flower bookmark
If you carried pre-pressed flowers or botanicals from home, an airport layover is a perfect time to turn them into a bookmark. Arrange the petals between clear adhesive film or laminate sheets, then trim the edges cleanly. If you want the full method, our pressed-flower-inspired craft mindset pairs nicely with this approach, and the botanical theme can feel especially tender for anniversary gifts or memorial keepsakes. For more nature-forward inspiration, see also the story behind natural materials.
4. Boarding pass memory sleeve
Tuck your boarding pass, baggage receipt, and a small handwritten note into a slim paper sleeve. Decorate the sleeve with airport stamps, doodles, or a color that matches the destination. This keepsake works well for people who want an archive without turning the suitcase into a scrapbook studio. It is one of those small items that feels ordinary on the day and priceless later, especially when paired with travel notes from your mini travel journal.
5. Destination snapshot envelope
Before you travel, print a few small photos or screenshots from your camera roll and carry them in a flat envelope. During the layover, label the envelope with the trip name, date, and a one-line reflection. Then slide the photos back inside with a note about what made the trip feel alive. This is a gentle way to start building a physical archive from digital pictures, a process similar in spirit to bridging physical and digital records.
6. Layover collage card
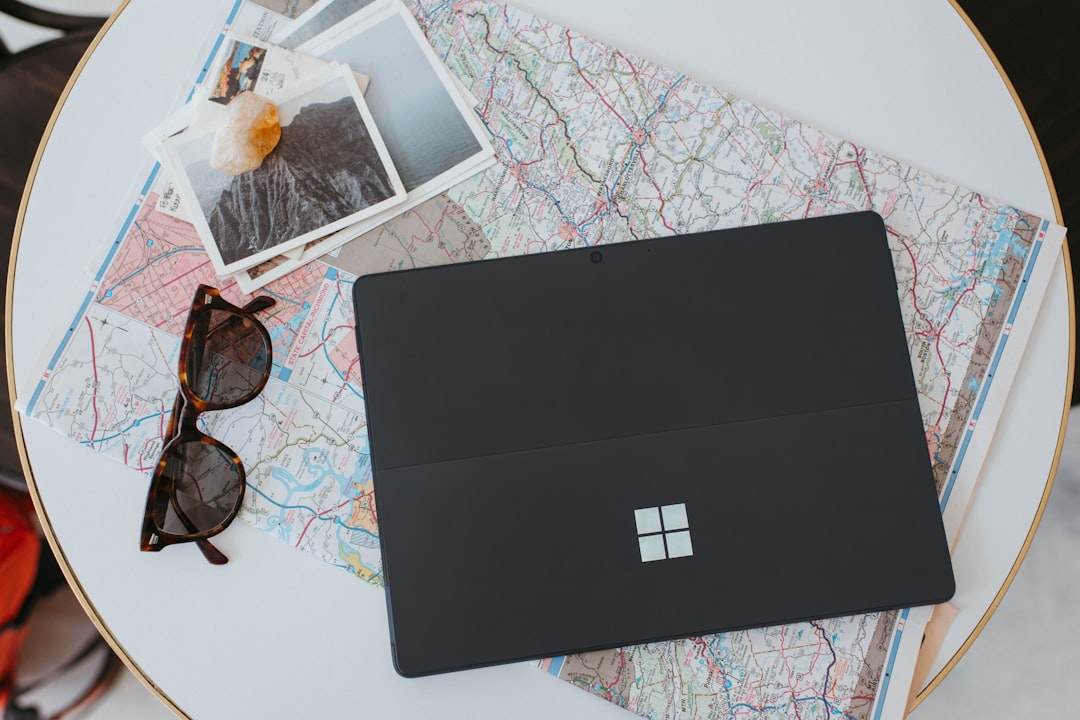
Use ticket stubs, coffee sleeves, maps, airline stickers, and bits of paper ephemera to create a small collage on cardstock. A collage card is a beautiful way to honor the fact that travel is made of fragments, not just landmarks. Keep the composition simple: one background, one focal item, and three supporting details. If you like this style of deliberate assembly, the same mindset appears in guides on found objects turning into sellable memories and even in careful one-page launch planning.
7. Handwritten gratitude strip
Cut a long narrow strip of paper and write down five things you are grateful for from the trip so far. Fold it accordion-style and tuck it into an envelope or journal pocket. This is one of the easiest airport DIY keepsakes, but it often becomes one of the most meaningful because it captures emotional context while it is still fresh. Travelers often remember logistics and forget feeling; this reverses that pattern. If your layover is stressful, the gratitude strip can be the calmest possible reset.
8. Tiny stitched paper flag
If you are comfortable carrying a needle and a small length of thread, stitch a simple flag or banner shape into folded cardstock. You can embroider initials, a heart, or the airport code of your connection city. This craft feels heirloom-like because the stitches create texture and permanence, even on a tiny scale. It is also a lovely handcrafted travel gift for a partner or child, especially when paired with a note about the journey.
9. Airport map annotation page
Print or sketch a tiny map of the airport and annotate the places that mattered: the best coffee, the quietest corner, the gate with the sunlight, the place you found a charger. This turns a transient place into a remembered landscape. It is especially good for frequent travelers who want to build a visual diary of repeated routes and familiar terminals. If you enjoy practical travel navigation, you may also like our guide to changing schedules and route risk mapping.
10. Pocket memory envelope
Make or buy a small envelope, label it with the trip name, and fill it with flat treasures: receipts, handwritten notes, pressed petals, a sticker, a luggage tag, and one printed photo. Seal it and date it. This is the most heirloom-ready of all the airport keepsakes because it can grow with time, becoming a little archive of an entire trip or season of life. For people making gifts, it is a beautiful form of handcrafted travel gifts that feels intimate without requiring advanced skills.
Pressed flower tutorial for travelers
How to prep flowers before the trip
The best pressed-flower work begins at home. Choose flowers that are already flat or easy to flatten, such as daisies, pansies, small ferns, and thin leaves. Place them between absorbent paper inside a heavy book or flower press for at least one to two weeks before travel. Do not bring fresh, bulky blooms through airport security if you can avoid it; dried and pre-pressed materials travel cleaner and are less likely to wilt. If you want a more botanically inspired look, the principles here align with the careful material story in from field to face.
How to assemble in a terminal safely
Use a clean flat surface, such as a table near your gate, and work with adhesive film or tape rather than wet glue if you want minimum mess. Lay the petals down first, arrange the focal bloom, then add accent leaves and seal the layer carefully. Keep everything dry and press firmly with the back of a spoon or a clean card. The goal is a thin, elegant piece that can slip into a book or wallet without crumpling.
How to make it giftable
Write a small caption on the back: location, date, and why you chose those flowers. If the piece is for a loved one, include a sentence tying it to the trip: “Picked for the morning I thought of you at Gate 14.” That sentence gives the craft emotional weight and turns a simple botanical piece into a memory with context. For readers interested in the trust and authenticity side of handmade work, our guide to authenticity in handmade crafts goes deeper into why these details matter.
How to avoid TSA and airport headaches when traveling with crafts
Keep liquids out of the kit
Most airport craft kits are easiest when they are liquid-free. Skip paint, wet glue, resin, or adhesive bottles unless they are tiny and clearly compliant with security rules. Instead, use glue dots, tape runners, sticker sheets, and folded paper elements. This not only speeds up security but also lowers the risk of leaks inside your bag, which protects both your craft and your clothes.
Use blunt, compact tools
When in doubt, choose tools that look like ordinary stationery. Pens, pencils, scoring tools, and small rulers are usually easier to manage than sharp blades or bulky supplies. If your project requires scissors, check airport rules in advance and use the smallest permitted pair. As with shipping precious items securely, prevention is more peaceful than improvisation.
Pack for resealing, not just making
The best traveling with crafts strategy assumes you may need to stop mid-project. Bring envelopes, zip pouches, and reusable flat folders so you can close each project quickly if boarding begins. Labeling each kit by project also keeps you from dumping everything out on the tray table. That kind of calm organization is closely related to the practical planning in flexible travel kits and the broader advice in value-focused packing guides.
Pro tip: Build your airport craft routine around “pause points,” not perfection. Start with a project you can stop after every five minutes and still feel finished enough to pack away.
How to turn your layover keepsakes into heirloom-worthy gifts
Use a consistent visual language
Heirlooms feel cohesive when they share a color palette, paper weight, or date format. If you are making keepsakes for a family album, choose one style for all trip years: same tag shape, same pen color, same place for the date. Over time, that consistency makes the collection look intentional and treasured. It also helps children or relatives understand the story without needing a long explanation every time they open the box.
Document the story, not just the object
A beautiful artifact without context can still feel mysterious later, so add a one- or two-line caption to each piece. Write why you saved it, who was there, and what happened in that moment. This is the same principle used in stronger reporting and better storytelling: give the reader enough detail to feel the scene. If you enjoy that kind of structured narrative, the approach echoes pieces like cross-platform storytelling and other content systems built to preserve meaning.
Store with care so the memory lasts
Once you are home, place the finished pieces in a flat archival box, binder sleeve, or memory envelope system. Keep them away from direct sunlight, dampness, and rough handling. If your keepsake includes flowers or fragile paper, a protective sleeve can dramatically extend its life. This final step is where a quick airport craft becomes a true family object, especially when paired with thoughtful organization and preservation habits inspired by digital-physical archiving.
Best ideas by traveler type and layover mood
For anxious travelers
Choose repetitive, calming tasks: stamping, writing gratitude strips, or arranging a pocket envelope. These keep your hands busy without asking for creative leaps. The point is soothing, not performative. Short projects can work like a reset button when travel feels uncertain, much like the stabilizing role of calm guidance in calm-focused messaging.
For families
Children often enjoy projects with clear boundaries, such as sticker journaling, drawing the plane ride, or making a date tag for a parent’s bag. Keep each child’s supplies in a separate pouch to avoid crowding and spills. Family crafts can become a ritual: one page per trip, one keepsake per airport. Over time, the stack becomes a timeline of growing handwriting, changing interests, and shared journeys.
For gift-minded travelers
If you are making a keepsake for someone else, choose projects that can be completed cleanly and stored easily. A pressed flower bookmark, a destination envelope, or a ticket-date tag feels intimate without being fragile. These pieces make lovely handcrafted travel gifts because they carry both place and thought. For shoppers who like identifying items with good long-term value, the mindset is a bit like choosing the right keepsake among options in comparison-based buying: select what will matter later, not just what feels exciting now.
FAQ: Airport craft and layover keepsake questions
Can I really make crafts at the airport without making a mess?
Yes, if you keep the project dry, flat, and small. Use paper ephemera, adhesive dots, stickers, and pens instead of wet materials.
What is the best craft for a 20-minute layover?
Ticket-date tags, gratitude strips, or a quick journal entry are ideal because they can be finished fast and packed away instantly.
Are scissors allowed in my craft kit?
That depends on airport and security rules. Check before you travel, and if you want to stay simple, pre-cut your materials at home.
How do I keep pressed flowers from breaking in my bag?
Store them flat between cardstock or in a rigid envelope. Never loose-pack them with heavy items.
What makes a layover keepsake feel heirloom-worthy?
Three things: a clear date, a brief story, and careful storage after the trip. The object matters, but the context makes it precious.
Related Reading
- How to Pack for Route Changes: A Flexible Travel Kit for Last-Minute Rebookings - Build a bag that stays useful when your plans don’t.
- Shipping High-Value Items: Insurance, Secure Services, and Packing Best Practices - Protect delicate keepsakes when they leave your hands.
- Bridging Physical and Digital: Best Practices for Integrating Data Into Real-World Systems - A useful framework for archiving photo-based memory projects.
- Embracing Ephemeral Trends: The Role of Authenticity in Handmade Crafts - Why personal meaning makes handmade items endure.
- Readymade to Revenue: How Found Objects Inspire Sellable Digital Assets - Turn small travel fragments into meaningful creative work.
Related Topics
Elena Marrow
Senior SEO Content Strategist
Senior editor and content strategist. Writing about technology, design, and the future of digital media. Follow along for deep dives into the industry's moving parts.
Up Next
More stories handpicked for you

Soft Launches, Warm Welcomes: Using Market Signals to Time New Keepsake Releases

Curating a Global Audience: When Your Handmade Shop Attracts Unexpected Markets

Harnessing Nostalgia: How to Use Vintage Aesthetics in Modern Keepsake Design

Shipping Keepsakes: How to Ensure Your Memories Arrive Safely

Crafting Memories: How to Create Artisan Keepsakes from Your Special Moments
From Our Network
Trending stories across our publication group

How to Market Handcrafted Goods to Car Buyers: Partnering with Dealerships and EV Events
Build a Maker Travel Dashboard: 5 APIs (Flight, Weather, Port, Transit, Wallet) to Automate Fair Day Decisions

The Potter’s Guide to Shipping: E‑Commerce Logistics for Fragile Ceramics

A Small Maker’s Guide to Gemini Enterprise: Security, Costs, and What Solo Sellers Should Know

Niche Audiences & Micro-Communities: How to Find Buyers for Specific Lithuanian Crafts
